Palmer Pedalbay 60 – Product Review by a musiker-board.de User
A musiker-board.de user was given the opportunity to test a Pedalbay 60 that was given to musiker-board by Palmer. His detailed review highlights the possibilities and advantages that the Palmer Pedalbay 60 offers its users. 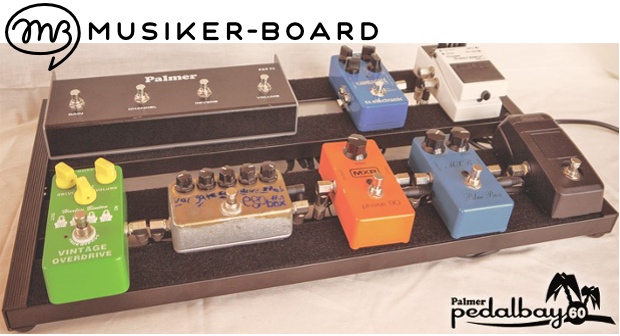
Contents
1. Introduction
1.1 About the Pedalbay range
1.2 Brief market overview
2. Unboxing
3. Detailed inspection
3.1 The possibilities of the cross bars
3.2 The power supply bracket
3.3 Height adjustment
3.4 Workmanship and strength
4. Changeover
4.1 The current situation and its disadvantages
4.2 Documenting the changeover
4.3 Advantages and disadvantages compared to the previous solution
5. Summary
1. Introduction
1.1 About the Pedalbay range
Why does the name Pedalbay 60 include the number sixty? The reason appears to be simple: Palmer doesn’t only offer one Pedalbay, but several. The number indicates the width of the effects board, while a further letter indicates a variable depth.
To give you a specific example:
The Pedalbay 60L has a width of about 60 cm but a depth of 39 cm – almost 9 cm deeper than the regular Pedalbay 60. The following diagram, which I’ve taken from the Palmer product news catalogue, provides a good overview of the models that are currently planned. 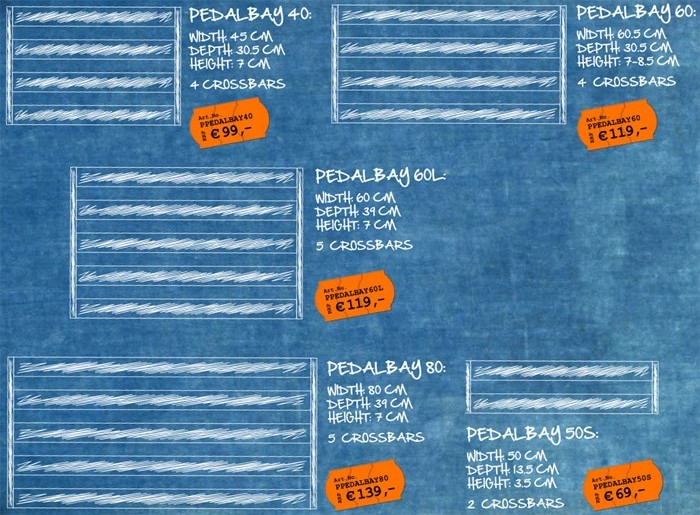 As you can see, five different models are currently planned, of which only the Pedalbay 60 is currently available from retailers. The range should offer a suitable board for most effects users, whether one of the notorious minimalistic effects boards or an averagely filled one.
The Pedalbay range is mainly characterised by the adjustable cross bars, which makes it possible to somewhat adjust the pedalboards to the equipment used. Multiple different power supplies can also be directly attached to the underside of the board and both the height of the rear feet and thus the angle of the board are adjustable. At this point, I would like to note that the Pedalbay 50S sometimes offers fewer options for adjustment than its larger siblings.
1.2 Brief market overview
Now let’s take a look at the Pedalbay 60 in comparison to other products. In addition to the common hard cases, a comparison with the Pedaltrain Two SC is likely to be particularly interesting. This is available for 10 more (as of 22/04/2014) and is currently regarded as the top dog on the market. For this reason (and naturally also because it uses a similar concept), we’ll take a look at this as a representative of the various other models available on the market.
Both products are made from aluminium and painted black. The Pedaltrain Two has a size of around 61 x 32 cm with a height of approx. 6 cm, making it slightly larger than the Pedalbay 60, which measures 60 x 30.5 cm.
Unlike the Pedaltrain, the Pedalbay comes with Velcro already attached. This has the benefit that you can’t accidentally stick the Velcro strips on at a slant. However, for other users, who don’t want to use Velcro, it means that the effects board is more susceptible to dust and dirt. It’s also inconvenient for those who want to attach the loop side to the effects rather than the hook side. However, everyone else can be delighted at not having to do as much work. In contrast, the Pedaltrain comes with both hook and loop tape, which users can stick on as required.
As a further accessory, both products come with a soft case (or gig bag), which can be used to transport the boards reasonably safely and practically.
Now, the main difference between the two models is the aforementioned main feature of the Pedalbay range: whereas the welded cross bars on the Pedaltrain make it completely static, the adjustable cross bars on the Pedalbay show that an effects board can also be more flexible. A further feature offered by both models is a way of attaching power supplies. On the Pedaltrain, this is in the form of metal bars, whereas the Pedalbay uses four U-shaped pieces, which act as hooks for rubber bands for holding the power supply in place.
A further feature on the Pedalbay are the adjustable rear feet. The Pedaltrain doesn’t offer this feature, but during my research I came upon a new competitor from Spain, the Aclam Guitars Modular Track medium. When looking at the price, however, this is clearly playing in a completely different league and therefore shouldn’t be regarded as a direct competitor when considering price.
In summary, it can be said that, based on the data sheet and the comparison with the Pedaltrain Two, the Pedalbay 60 is priced sensibly and may well be a real alternative to the former.
2. Unboxing
Now that we’ve worked our way through the data sheets, we’ve come to the more interesting part of the review: the pictures! I won’t write much in this section. It’s mainly about opening the packaging, gradually removing the contents and then letting the pictures speak for themselves. We’ll then move on to the actual test, where I’ll once again write more for those who prefer text to pictures.
But first, a few pictures of the packaging: 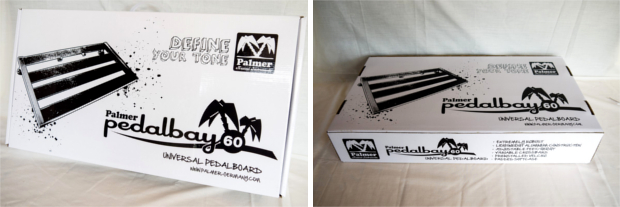
When you open the box, you’re greeted by the aforementioned gig bag: 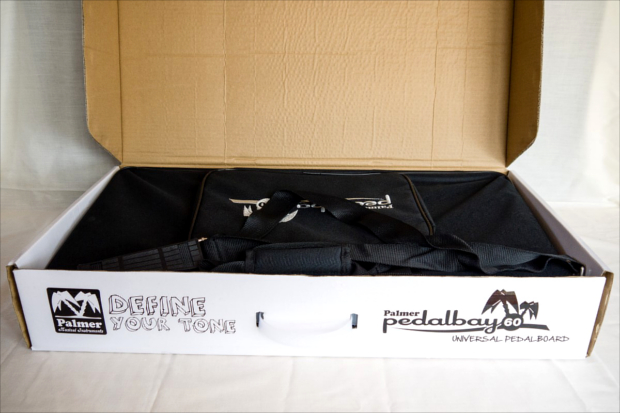
Looks nice so far, but where is the board? This can only be seen when you open the gig bag. 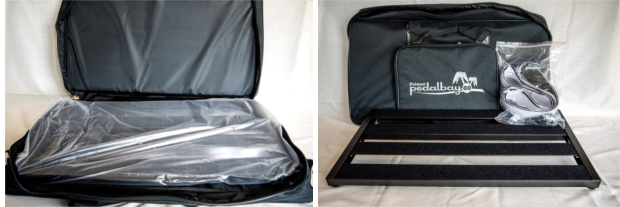
So, here they are, the gig bag, the board and a bag with all the little stuff. Let’s start by taking a look at the latter: 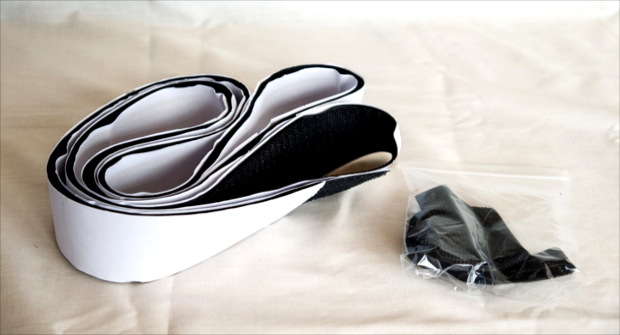
Velcro plus a further plastic bag containing two rubber bands and an Allen key for adjusting the cross bars. All the contents are now fully unpacked. So, let’s take a further quick look at the gig bag as I’m sure there’ll still be a few things to see there. 
Is it possible that someone has actually thought this through? The zip for closing the bag certainly seems to be useful and the carabiner hook looks robust. What more do you want?
As I don’t really want to focus much more on the gig bag during this review, I’ll reveal the test result for this now: in general, there isn’t a great deal to say about it. It appears to be robust and is sufficiently spacious and even slightly padded. It should therefore fulfil its purpose, which means that I don’t think there’s anything to criticise here. However, you should naturally bear in mind that when it comes down to it, it can’t replace a proper case, but I’m sure the gig bag wasn’t actually designed to do so anyway.
Now let’s put the accessories to one side and move on to the more interesting review object: the Pedalbay itself. I’ve once again provided a number of photographs with comments.
First, a further overview of the board:
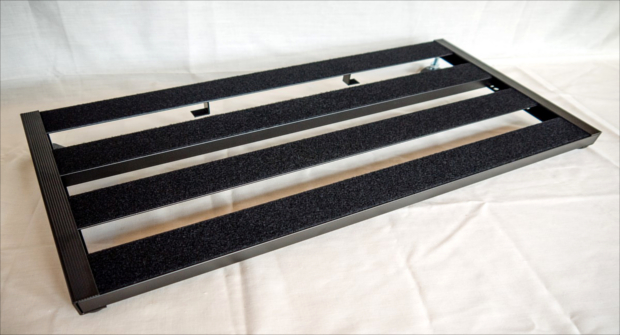
We can instantly see several promising features, including the power supply bracket:

There are also front feet and adjustable rear feet.

Here, we can also see that a ball joint can be used to adjust the rear feet to the tilt of the board and the surface on which it’s placed.
Before we take a more detailed look, we’ll also take a quick look at the design of the cross bars:
3. Detailed inspection
This section is where we really get down to business! We’ll start by inspecting the adjustable cross bars before also taking a closer look at the power supply bracket. After that, we’ll look at the adjustable feet and then finally, at the Pedalbay’s workmanship and strength.
3.1 The possibilities of the cross bars
Having mentioned the adjustable cross bars countless times already, it’s now finally time to take a closer look at them.
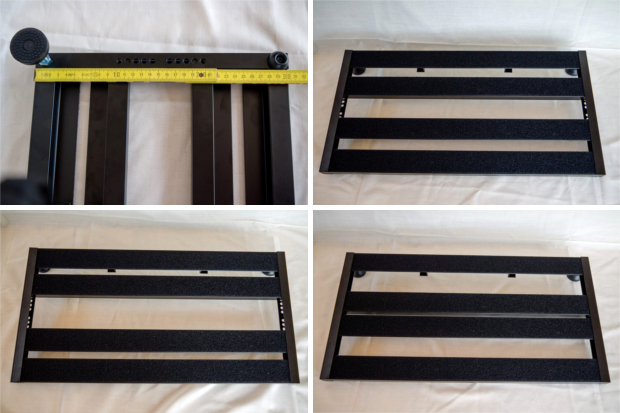
The cross bars are loosened by means of simple screws and the associated bore holes, of which there are five per side and bar, although only the two inner bars are actually adjustable. In theory, this means there are 25 different ways in which you can position the cross bars.
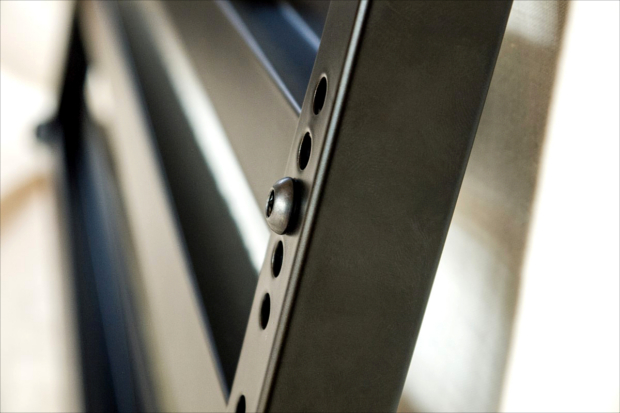
First, I used the Allen key provided to loosen the rear of the two cross bars. So far, so good although the Allen key seems to wear quickly. For the purposes of the test, I simply started by selecting the rear-most position, which then looked like this:
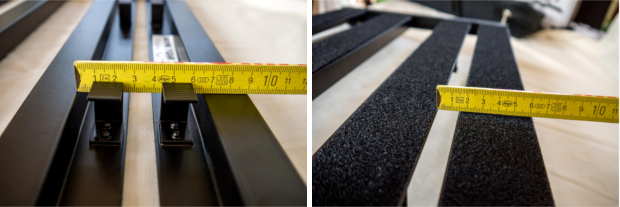
The power supply then still has a good 6.5 cm. Viewed from above, the gap between the two bars is only 1.5 cm. A gap of around 5.5 cm now exists between the two middle bars, whereas the gap between the two lower bars in the default configuration is 8.5 cm when viewed from below and 3.5 cm when viewed from above. 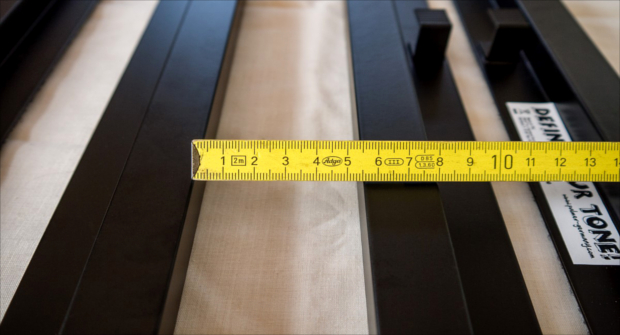
On closer inspection, the following distribution arises in the standard configuration:
Viewed from above, there is a gap of 3.5 cm between all bars. Each time a bar is moved, the gaps are widened or narrowed by 1 cm at the corresponding places as the bore holes are each positioned 1 cm apart. When viewed from below, the gaps in the board are slightly larger: the gap in the centre is still 3.5 cm but the two outer gaps are now 8.5 cm due to the aluminium profiles selected. Following this initial test, I then moved the rear of the two middle bars forwards as far as possible. This resulted in the maximum power supply depth of 10.5 cm.
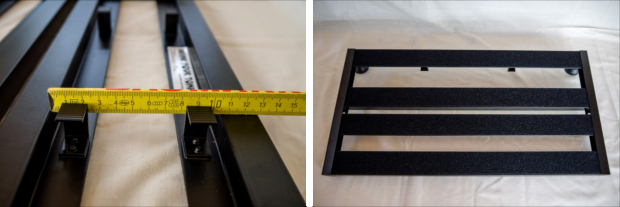
Now comes the first real area where I really have to criticise the Pedalbay. Once I’d adjusted the rear bar several times, I started to adjust the front bar. On trying to loosen the screws, I suddenly encountered problems:
Firstly, the Allen key now appeared to be rather worn and secondly, the screws were threaded. You may remember that even after undoing the first screw, the Allen key had already started to look worn. Now nothing worked any more as the Allen key couldn’t get any purchase. However, I didn’t want to give up too quickly and went and got a battery-powered screwdriver with the appropriate bit. And as you can see, the screws no longer posed a problem.
I think I’ve identified the issue: firstly, the material used for the Allen key and screws appears to be slightly too soft and secondly, you can’t exert enough pressure with the Allen key to stop it from slipping out of the screw and damaging this slightly. I’d therefore recommend using either a standard or a battery-powered screwdriver with which you can exert enough pressure. Anyone who wants to frequently adjust the cross bars should also consider replacing the screws with better quality ones.
Before I conclude my section about the cross bars, I’d like to briefly show you a few more combinations. I won’t, however, show you all the possible combinations as you should be able to figure these out for yourself with a little imagination.
I’d also like to make one more little comment: as some of you have probably already realised, only 24 and not 25 combinations are actually possible if you only use the intended holes. The reason for this is simple: the gap between the middle bars is 3.5 cm but we need at least 4 cm to move the bars to the outer-most hole (as a reminder: the gap between the holes is 1 cm).
3.2 The power supply bracket
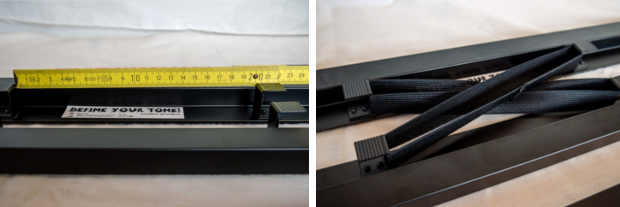
We’re now going to move on to the power supply bracket, of which I’ve so far only shown you the attachment hooks. The gap between these is around 20 cm, allowing the attachment of power supplies with a base area of up to 10.5 x 20 cm. The power supply is attached using the rubber bands provided, stretched into a cross shape.
As I’d promised to test my Fame DCT-200 with the Pedalbay, I naturally did this. Start by taking a look at the pictures to see what you think:
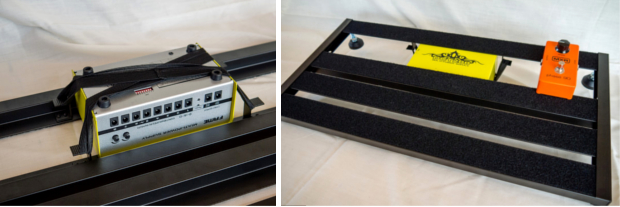
As you can easily see, the power supply fits underneath without a problem. There’s even space left over at the side. To achieve this, however, I had to move the rear middle bar to the rear hole of the front middle bar. The gap at the front is therefore very narrow while the one at the rear is still small enough to reasonably attach an MXR pedal. I agree that it looks a little unusual, but the setup could still be practical if you have pedals that are large enough.
What naturally makes less sense, however, is that the board is no longer supported by the rear feet but by the power supply. The feet are too short. However, with a little creativity, it should be possible to create suitable replacement feet from a threaded rod and other small parts.
Unlike the DCT-200, however, most common and reasonably-sized power supplies should fit. You should also consider that the DCT-200 is extraordinarily large. As this had led me to presume that I’d need a new power supply, I’d summarily organised the all-round popular Harley Benton PowerPlant Junior. The results achieved with this are instantly far better.

The PowerPlant sits beneath the board relatively securely although it does slip very slightly if you exert a little force. It may have been useful to have a second, more tightly fitting set of rubber bands for attaching smaller power supplies more securely. If the rubber bands become stretched, however, I’ll simply use Velcro instead and additionally affix the power supply. That should certainly suffice.
On the whole, however, the device leaves a good impression. It’s clearly not suitable for all power supplies but still far more flexible than other solutions such as angled rails.
3.3 Height adjustment
We’ll now take a brief look at the height adjustment, although there’s not really a great deal to show you in this regard. The two photographs below show the minimum and maximum board heights.
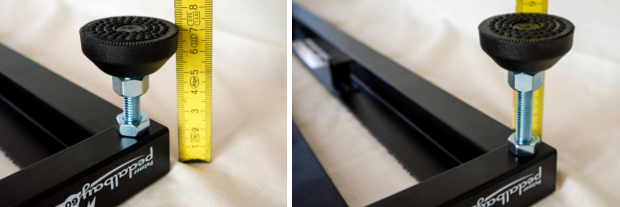
The minimum height of just over 7 cm is the factory setting. In my opinion, if you want to ensure sufficient stability, you shouldn’t actually really screw the feet much further out; I found that just under 9 cm was the highest value at which the feet were still really stable. Unless I’ve overlooked something, that means that only very slight height adjustment is possible.
Of course, you could also shorten the threaded rods to lower the height by another about 2 cm. However, this is a step that you should consider carefully as you can’t currently buy spare feet.
3.4 Workmanship and strength
At special request, I’m now not only focussing on the Pedalbay’s workmanship but also on its strength. The brief test showed that you don’t need to worry when placing loads on the board. The board only gave very slightly when I stood on it with my full weight. However, you should consider that both the rubber feet and the carpet on which the board stood during the test still allowed for a little play. In conclusion though, anyone who doesn’t plan on wildly jumping around on the board doesn’t need to lose any sleep over its stability.
In general, I’m extremely satisfied with the workmanship. As everything except the power supply bracket is attached by screws, you don’t need to worry about unclean weld seams. The paintwork is clean and the Velcro is stuck on firmly.
The only execution-related criticism is in relation to the tool supplied for use with the cross bar screws. Aside from that, everything gives off an impression of being solid and suitable for use on stage.
4. Changeover
This section is where things get particularly interesting for me. It’s about changing from my old effects board to the Pedalbay. I’ll start by presenting the situation I was in before receiving the Pedalbay.
4.1 Current situation
Let’s start this section with a couple of photographs of my old board, which I’d made myself:
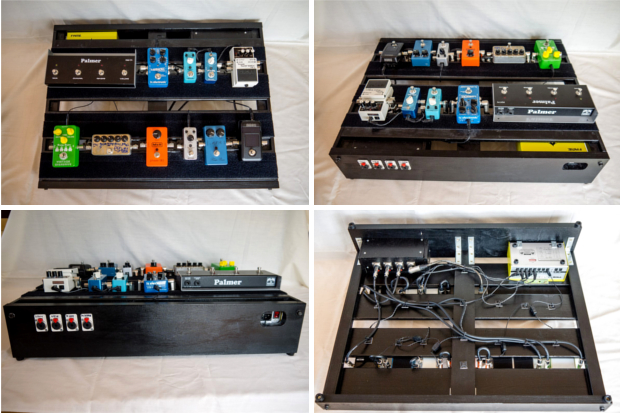
I built this about one-and-a-half years ago by vastly modifying an Ikea Gorm shelf. At the time, however, there were quite a few things to which I didn’t give proper thought, such as the board depth. I actually wanted a transportable solution but that was problematic with my home-made board. Firstly, there’s no standard case that I could have used to reliably transport the board. I’d therefore have had to obtain a custom-made one. But for what that costs, you can buy a ready-made board with a case.
Secondly, the size of the board means that it’s extremely heavy – even more so because of the DCT-200. Despite all of this, I was satisfied with the board for a long time, even if I didn’t use a lot of the space that it offered, partly due to the size of the bars.
And so, in summary: the board is quite large, heavy and the space isn’t sensibly used. This screams for a smaller, lighter solution.
There’s actually also a further reason for using a smaller board: over time, I’ve noticed that I almost never use the three Mooer effects. This isn’t because they’re no good, but rather that I don’t really need them. It’s therefore not necessary to attach these three pedals to the board.
4.2 Documenting the changeover
Now that you know about my board, we can continue. We’ve already looked at the attachment of the power supply so I’ll move straight on from that. First, I arranged all the pedals on the Pedalbay to estimate the amount of room required. I largely based the layout on the old setup with the exception of the aforementioned removal of the Mooer effects.
I want to make a brief comment here: as the guide rails unfortunately aren’t flush against the cross bars and don’t have Velcro stuck to them, save for a few exceptions, you’ll be restricted to attaching the effects to the Velcro-covered areas.
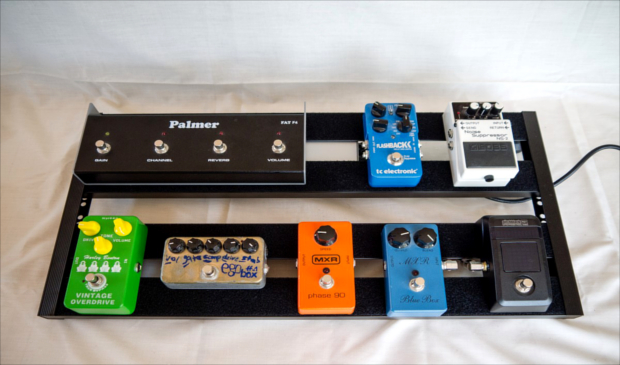
At first glance, this setup looks very practical but the pedals still had to have their cables attached. Afterwards, the board looked like this:
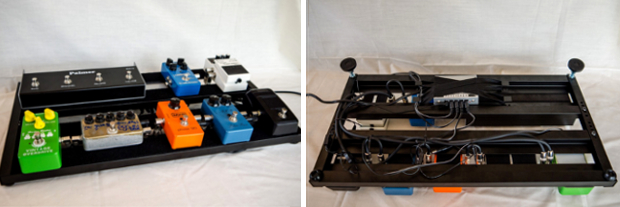
Some people may now ask why I left the underside in such a mess. The reason is relatively simple. I’d affixed a patch box to my old board but don’t have one here.
To be specific, that means that I’ll shortly construct a patch box, attach it to the board and then tidy up the underside.
Before we end this section, there’s still a brief size test to be conducted. Yes, the board fits in the bag and the bag zips up.
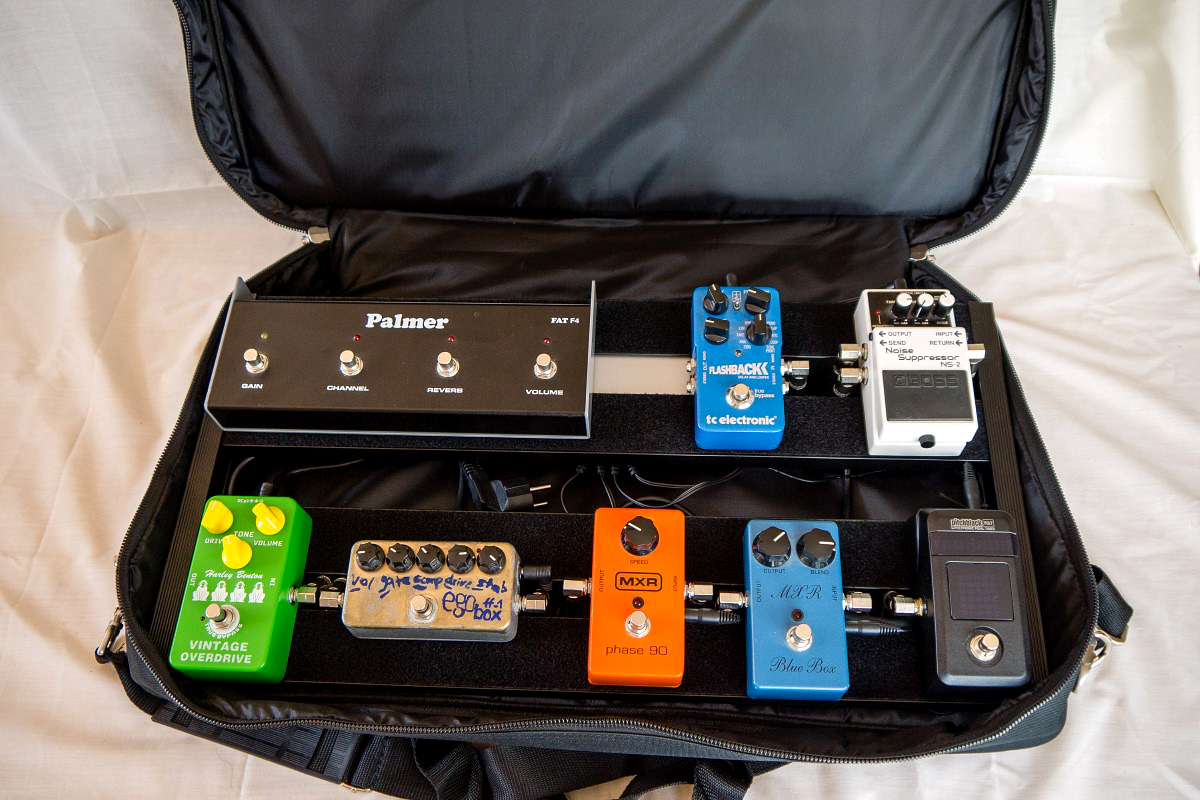
4.3 Advantages and disadvantages compared to the previous solution
What are the benefits of the Pedalbay for me personally? To be honest, there are only advantages. The only disadvantage you could say is that the Pedalbay is smaller. For me personally, however, that’s clearly not a disadvantage but rather an advantage.
My board is now more compact, lighter and, thanks to the bag, far easier to transport than the old board. I can also change my equipment far more flexibly, especially due to the ability to adjust the board. When it comes down to it, I can therefore make more room for the power supply or (as done here for the Fuzz Factory) reduce the gap between the bars. All in all, I’m personally very satisfied with this solution.
5. Summary
As a final section, I’d like to briefly recap what I’ve ultimately determined during this review. In doing so, I’d like to start by saying that I find the Pedalbay to be a very solid solution that has no reason to fear comparison with other similarly priced competitors such as the Pedaltrain. Thanks to the flexibility provided by the adjustable bars, the Pedalbay is suitable for most users.
I find the accessories reasonable, especially the practical bag for transporting the board. However, I find the inclusion of the Allen key rather dangerous. In this regard, Palmer should make improvements, install better screws and ideally include a better quality tool.
I’m less impressed with the height adjustment of the rear feet as, for me personally, these offer too little room for manoeuvre. However, the bar joints impress by guaranteeing good stability. It may be that the accessories include feet of different lengths in future. It should at least be possible to purchase spare cross bars from Palmer.
On the whole, I’m also satisfied with the workmanship. Aside from the aforementioned screws, the Pedalbay doesn’t have any major faults. In general, therefore, the Pedalbay gets a great deal right and doesn’t really get anything wrong.
As we’ve now come to the end of my report, I want to take the opportunity to thank the teams at musiker-board and Palmer who made this review possible, and of course, also to thank you for reading!
Source: musiker-board.de, Germany, April 2014
Thank you very much to ‘DasRofl’ for this fantastic, highly detailed and, above all, informative test report! On behalf of Palmer, we wish you and our other fans many hours of fun and success in the future with our pedalboards!
Further information and product videos as well as a current list of pedalboard dealers can be found at
http://www.palmer-germany.com/mi/en/Products/Pedalboards-and-Accessories.htm
Leave a Comment
You must be logged in to post a comment.


