
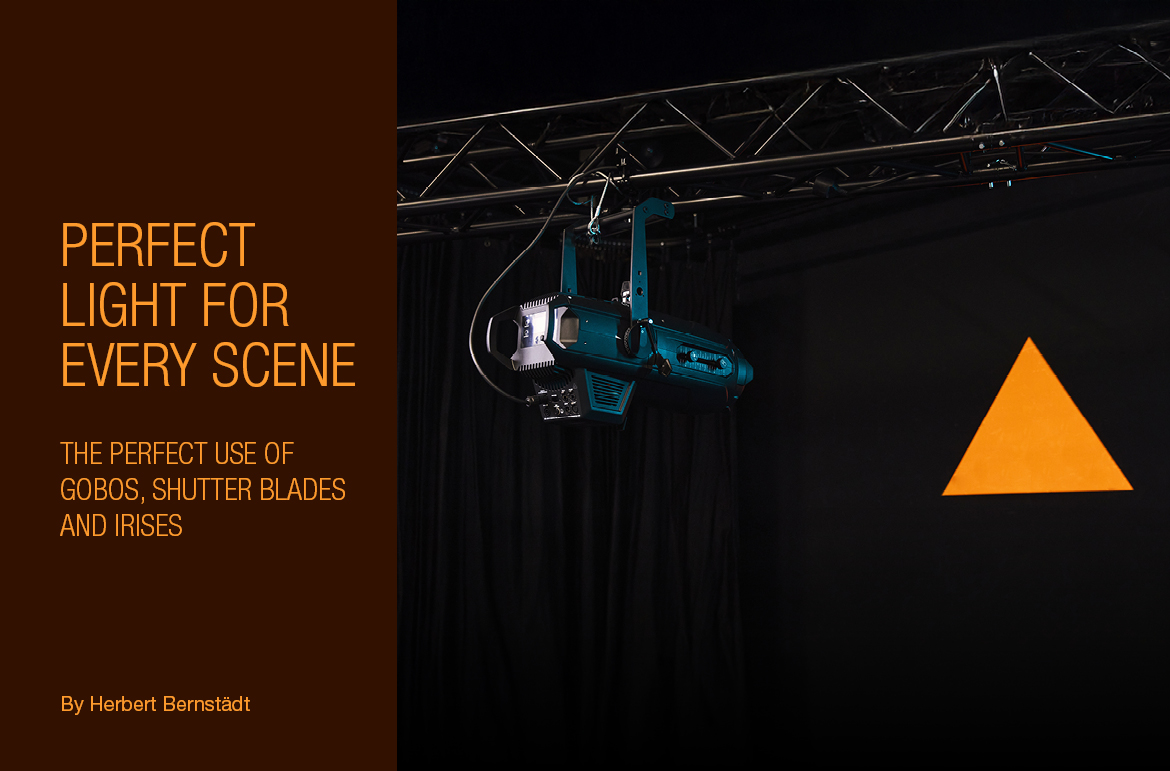
Perfect light for every scene – part 3: the perfect use of gobos, shutter blades, and irises
Light is more than just brightness. It shapes spaces, attracts attention, and creates atmosphere. This third part of our series is all about the tools you can use to sculpt light in a targeted way: gobos, shutter blades, and irises. How can clear edges be set to precisely define stage boundaries? Which gobos are suitable for razor-sharp projections and which ones for atmospheric effects? And how can you flexibly control the light cone with an iris? We will provide you with practical tips for the professional use of these lighting tools – whether for theatre, events, or other lighting tasks.
Imaging
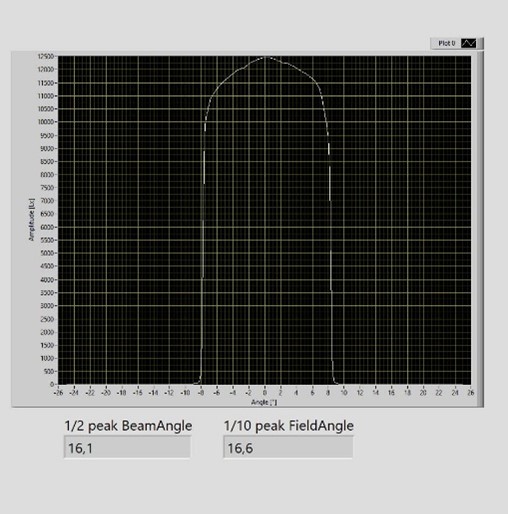
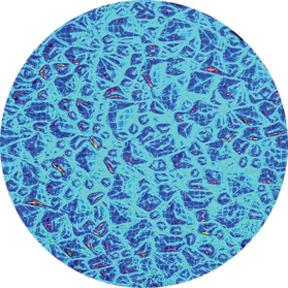
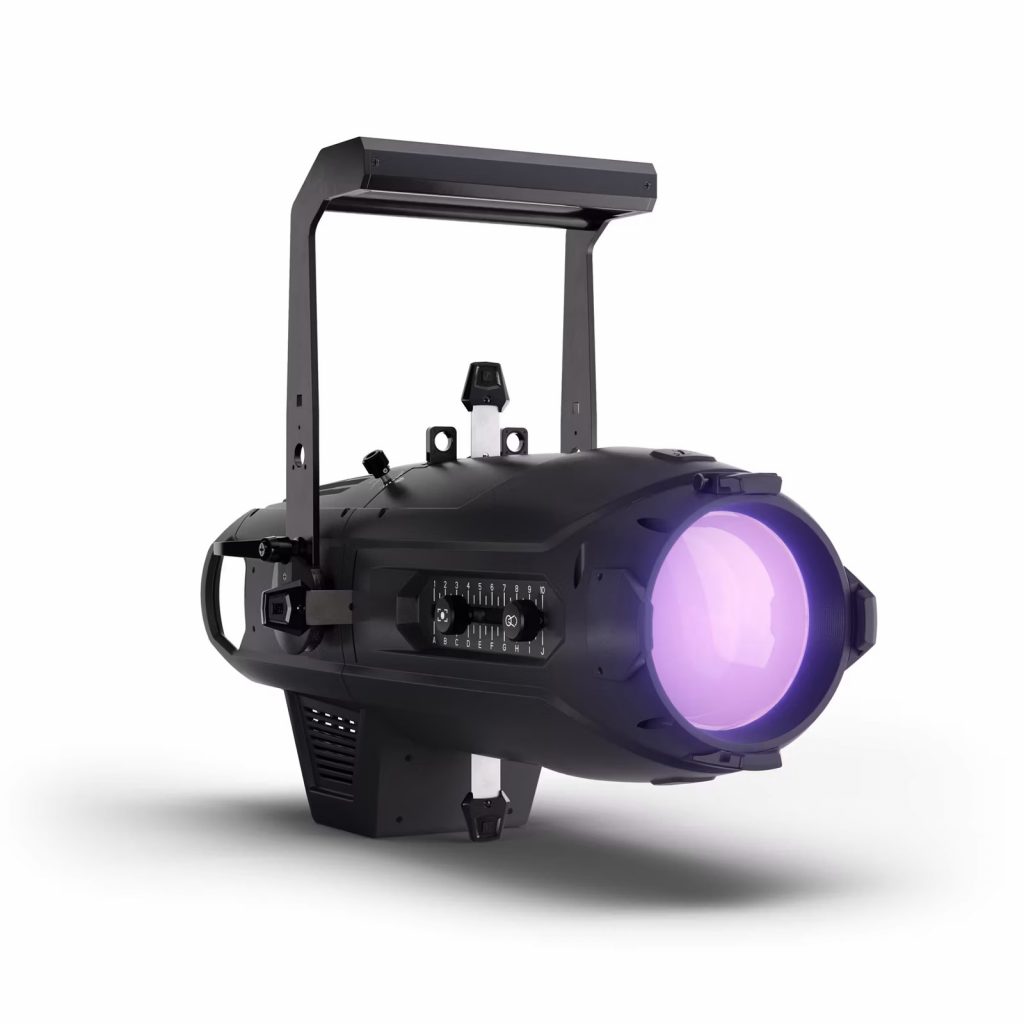
The imaging plane with its functions such as the gobo, shutter blade, or iris is the key component of a profile spotlight. Its quality and potential uses are shown here. The disadvantage with previous light sources such as halogen or discharge lamps was that they were placed in a reflector system with a base. This is often associated with differences in brightness caused by base shading; the filament arrangement in the case of halogen lamps; and manufacturing tolerances in the alignment of the optical system, which can frequently be remedied through adjustment options. LED light sources, on the other hand, provide very homogeneous light distribution. In the case of gobo projections, especially for company logos and lettering, uniform light distribution towards the edges, which can be specified with a light distribution curve (LDC), is an important quality feature. This ensures that the letters shown do not disappear as they approach the edge.
An optimum light distribution curve from the Cameo P2 with 19° tube. Pronounced almost vertical flanks at the edge and only approximately 1/5 difference in brightness towards the edge within the projection surface.
Shutter blade
With the shutter blades, it is possible to set hard edges, ensuring the front edge of the stage is not brightened or does not shine beyond the decoration. It is also possible to design stage areas. You can define paths, highlight edges, or illuminate chequered patterns. One of the major difficulties here is that not only does a shutter have to be moved into the beam path, but this shutter also has to be tilted around its own axis. Depending on the principle approach, it is possible for the shutter blades to have different degrees of freedom. This can mean that one system only allows the shutter to be retracted to just before half of the light circle, while others also allow retraction up to 70% or even complete shading with just one shutter. The rotation of the individual shutter blade is the next criterion. Can it only be tilted to the right or left by 30° or is more possible?
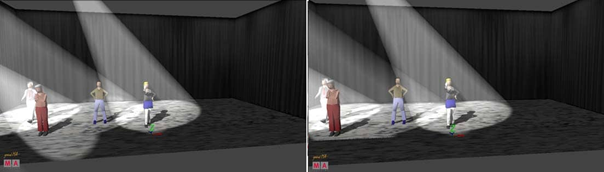
Image 1 Uninfluenced light cone
Image 2 Shifting of the front and rear stage area
The four shutter blade planes make it possible for a triangle to be shifted, but this comes at the cost of not being able to sharply depict all four planes. The example shown here is with the P6. In this case, it is clearly visible that no barrel or cushion effect is produced at the straight edge of the shutter blade.
Equipment tip:
A shutter blade locking mechanism as is found on the Cameo P6 is rare, and this is exactly where its advantage lies. It is particularly important in specific cases, such as when vibrating speakers are mounted on the same support structure. In such situations, vibrations in combination with gravity can cause the upper shutter blade to slowly slide downwards.


The locking mechanism is also extremely helpful when it comes to handling: everything stays in place once the shutter blades have been perfectly adjusted. Without a locking mechanism, even slight contact could unintentionally change the position of the shutter blades.
The shutter blade locking mechanism on the Cameo P6
Equipment tip:
You’ve created a nice square and put the gobo in place to match it, and then the spotlight has to be moved to a different position. Usually, this means having to realign all four shutter blades to the change in position. Unless the tube can be rotated. In some positions, for instance, on gutters or below the lighting bridge, it is very difficult to operate the lenses because they are on the other side. If you could rotate the tube by 180°, the operating element would be positioned closer to the light fixture. This is why the tube on both the Cameo P2 and the P6 can be rotated.


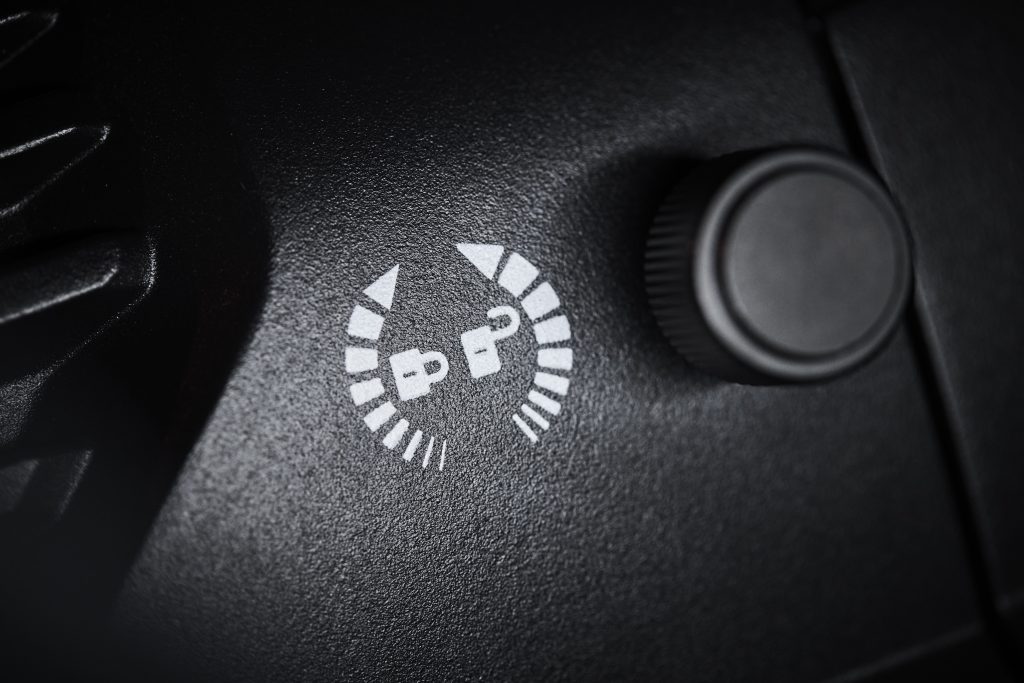
The knob for locking the tube on the P6 is shown here.
Iris
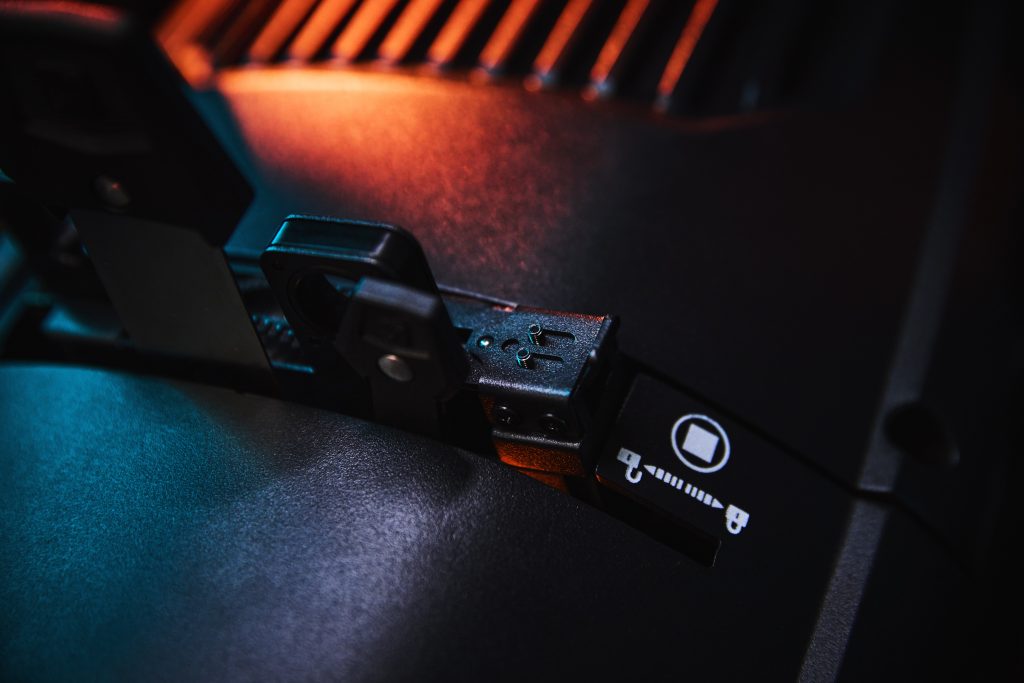
The task of the iris is to change the size of the diameter of the projected circle of light. In the case of a moving head profile spotlight, the iris is usually located close to the shutter blade unit. Conventional spotlights usually have a separate slot for a removable iris module, as is the case with the Cameo P6 or P2.


Slide-in iris on the Cameo P2
Slide-in iris on the Cameo P6
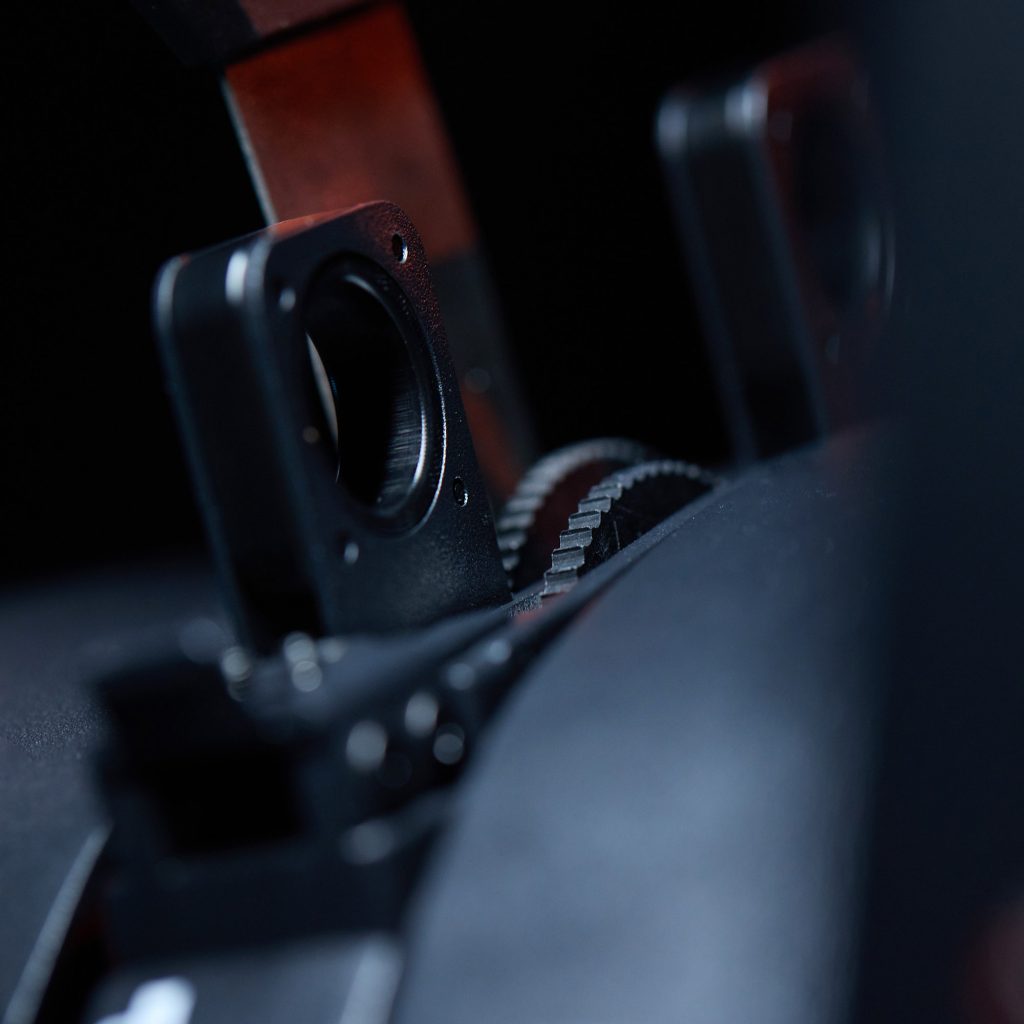
The iris is one of the most sensitive components in a moving light, as it consists of many small, conventionally sickle-shaped plates that are arranged in an overlapping circle like a brick structure. Each plate is mounted on a pivot point. Twisting the plate allows it to shift slightly into or out of the beam path. The sickle plates, arranged in a circular pattern and adjusted simultaneously, result in a circle. If very thin sickle plates are used, then the depth of the component is very shallow – which ensures good imaging quality of all boundary lines if they are in focus. This, however, is countered by the temperature in the lamp head and the heat generated by the incident light on the shaded surfaces. This stress can easily warp delicate plates, causing the sickles to jam or jerk when adjusted. As such, the blades are usually coated to achieve the lowest possible coefficients of friction.
An iris unit that allows a blackout is not required for a moving light. The last way to achieve a blackout is by setting a dimmer to 0%. With a moving head, the iris is often also used as a dynamic effect, for instance, having the beam cone opening and closing in sync. With a conventional spotlight, a zoom is usually used to change the light cone statically. The benefit of this is that the brightness of the illuminated surface increases as the beam angle narrows. However, if the conventional profile spotlight is modified and used as a followspot, the light cone diameter needs to be changed without changing the brightness. Using an iris in this case is advised because the lighting on the actor should not vary, especially if they are being recorded by a camera.
Gobos
An essential task of the profile spotlight is gobo projection. Gobos are also known as vignettes in the southern hemisphere. A gobo can be displayed using a punched sheet of metal, a coated glass gobo, or a glass that provides brightness and colour structure. The light is shaded, discoloured, or even refracted by a gobo in order to be projected onto a surface, scene, or person, either in focus or out of focus. In short, this wide range of options gives an idea of the immense creative freedom that can be achieved with gobos.
A stage area, now imagine a chest of drawers and upholstered armchairs as well as a sofa set in the room. A projected window makes the backdrop wall appear like a real window or gives a stronger illusion of a room wall with a window.
Metal gobos
Metal gobos are usually made of stainless steel and are approximately 0.1 mm thick. Aluminium alloys with a thickness of 0.2 mm to 0.5 mm are also possible. Gobos made of aluminium alloy are mainly used for fixed installations. This is because alloy is able to reflect heat better than steel and therefore has a much longer service life than steel gobos. Surfaces are then punched or etched out of the metal depending on the motif. This produces a typical black-and-white pattern in the projection. This makes it possible to produce excellent break-ups. Break-ups are creative motifs that make interplays between dark and light possible on the stage area. From a forest of leaves, which suggests the sun shining through a tree onto a park bench, to the classic example, the window cross, which simulates sunlight streaming into the room. Clouds, water, palm branches, city skylines, or starry skies can also be superbly crafted with metal gobos.
On the other hand, you sometimes have to make compromises when it comes to letters, fonts, and special motifs with metal gobos. After all, if a surface is to be darker in the centre and light is to radiate all around it, you need bars to hold the metal in the centre. If these bars look too “unprofessional”, glass gobos can be helpful, as the shading layer is held by the translucent glass and thereby makes retaining bars unnecessary. Metal also has an unpleasant property when exposed to high heat: it deforms. This deformation thus causes protruding surfaces, such as the tips of palm trees, to be distorted, meaning they bend away from the imaging plane and are consequently no longer sharply displayed. However, if a completely sharp projection is required, the glass gobo is preferred even for simple motifs, as no parts of the image can bend and the entire imaging plane is therefore always in the focus range of the lens.

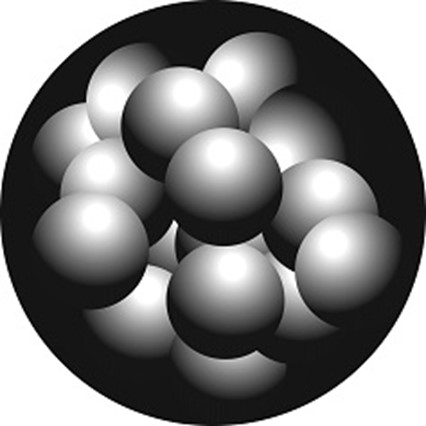
Typical metal gobo. Note the retaining bars in the centre of the ball on the 06, which are necessary to hold the metal in the centre of the 0.
This gobo is from Rosco Gobos.
Glass gobo
Borosilicate glass is often used as it has a higher temperature resistance (up to 480° to 500°) than simple glass. If even higher temperatures are expected in the beam path, quartz glass (still dimensionally stable at 1,100°) is used, but this is more difficult to process. To minimize the heat load on the glass or gobo as far as possible, reflective coatings are often applied to these gobos, while the back is usually matt or black so that no reflections are picked up by the secondary optics. As already mentioned, glass has the advantage that no retaining bars are required. This advantage also hides another very important advantage over metal gobos: the shaded surface can be positioned as an extremely small dot on the glass surface. If many of the small dots are arranged in a grid pattern next to each other, our eyes can no longer sufficiently make out or deconstruct the black-and-white structures; we then see a shade of grey. It is therefore possible to create all shades of grey with glass gobos. These are then referred to as high-resolution gobos or photorealistic gobos, which can achieve a resolution of 3440 dpi. 2540 dpi is used in general for consistent reproducibility. Dpi is the abbreviation for “dots per square inch”. One disadvantage of glass gobos is the reflection of light when it hits the glass and possible discolouration of the white light through the glass.
Application tip:
Glass gobos are handled in a similar manner as light sources. Never touch the gobo with your bare fingers. Oils produced by the skin remain on the glass and cause greater thermal stress on the gobo, which is equivalent to the usual burn-in process Pure alcohol and a soft, lint-free cotton cloth are suitable for cleaning glass gobos. When inserting the glass gobo into the gobo holder, please note the following compared to the metal gobo: make sure that the glass gobo can be inserted easily and has enough space to expand. Sometimes it is necessary to glue in the gobo. To do this, it is best to use silicone. The silicone, however, should not be applied around the entire circumference, but only in three small areas around the circumference.
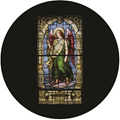
No retaining bars are required on glass. This also makes spatial patterns possible.
This gobo is from Rosco Gobos.
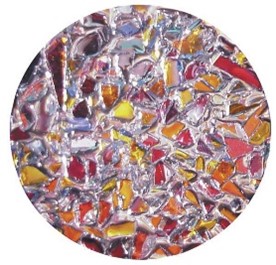
Coloured glass gobos
Instead of the reflective coating, it is also possible to apply a dichroic colour coating. We refer to this as “coloured gobos”. A distinction is made between single-, double-, and triple-colour gobos and four-colour or multicolour gobos. For the single, double, triple and quadruple colour gobos, a separate layer is used for each colour, and this is applied to a separate glass layer. In this case, the black-and-white layer is also regarded as a colour layer. Each colour layer requires a supporting glass plate, i.e., a layer that is approximately 1.1 mm thick. A multicolour gobo is then 4.4 mm thick. The disadvantage is that the colour layers are positioned at different depths in the glass. Depending on the spotlight’s imaging quality, one colour may be reproduced very sharply, but the motif with the other colour may no longer be in the optimum focal plane. That is why other material thicknesses are used for moving lights. The first carrier layer is 1.1 mm thick, with extra-thin carrier materials measuring only 0.4 mm in thickness then being applied. As such, the multicolour gobo is only 2.3 mm thick. This is, of course, a huge advantage for the image quality in terms of depth of field.
photorealistic gobo
ColorWave gobo
prismatic gobo
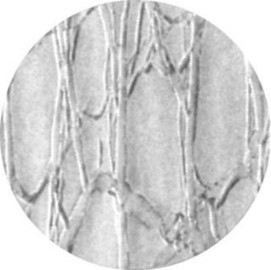
structured glass gobo
All these gobos come from Rosco Gobos.


Application tip:
Two gobo wheels can often be found on a moving head profile spotlight. This is very attractive for dynamic effects. Two gobo holders are less common in conventional spotlights. The Cameo P6 has two gobo inserts next to each other. These can be used both as an iris and as a gobo insert and also allow two gobos to be fitted, for example, a breakup with a colourizer.


There are two ways in which to insert a gobo on the Cameo P6 – practical that the handles are laterally positioned and do not get in the way of each other.
Application tip:
Once the gobo has been inserted into the gobo holder without any fingerprint smudges and the gobo holder has been inserted into the gobo slot, the gobo is projected onto the desired surface. With company logos or lettering in particular, you will notice that the horizontal lines are not projected horizontally on the wall. In general, you remove the gobo holder, rotate the gobo slightly, and attempt it once more The Cameo P6’s gobo holder has an integrated, manually adjustable mechanism that allows the gobo to be externally aligned.
Extremely easy to use, the Cameo P6’s gobo holder allows a gobo to be externally aligned.
Application tip:
A gobo in a profile spotlight is used upside down and inverted. In the case of custom gobos in particular, such as company logos, the inverted production of the gobo must be taken into account. Many glass gobos must be inserted with their coated side facing away from the lamp, and simply turning them upside down is not ideal. And as with conventional light sources, do not leave any fingerprint smudges behind, the temperatures in the beam path burn the oils in.
Selection tip:
While each manufacturer has defined its own gobo size for moving head spotlights to provide a sufficiently large zoom range with their optics in confined spaces, standard sizes were used early on for conventional spotlights in the theatre. The larger the imaging area (inner diameter), the finer the depth of detail that can be realized in the graphics and the greater the power of the spotlight can be, whereby the latter is presently going through a period of change, taking the future laser phosphor light sources such as the Cameo ORON® H2 into consideration.
| Size/Type | Outer diameter (OD) | Inner diameter (ID) | Cameo Profiler |
| C | 150.0 mm | 112.1 mm | |
| A | 100.0 mm | 68.0 mm | |
| B | 86.0 mm | 64.0 mm | P2 up to 2 mm thickness |
| M | 66.0 mm | 49.0 mm | |
| G | 66.0 mm | 45.0 mm | |
| L | 58.8 mm | 47.5 mm | |
| D | 53.3 mm | 40.0 mm | |
| T | 46.5 mm | 38.0 mm | |
| E | 37.5 mm | 28.0 mm | P6 up to 3.4 mm thickness |
| J | 38.8 mm | 25.0 mm | |
| F | 38.0 mm | 22.0 mm |
Stay tuned for the next and final part of this series: here we will look at the differences between moving head and static profile spotlights.
Missed the first two parts? You can find the previous posts here:
Perfect light for every Scene: introduction to profile spotlights – Part 1
Perfect light for every scene – part 2: tube types and zoom technologies in detail
This might also interest you
UNITE FOREVER – Cameo at T ...
28. August 2025
Lights over Seville – Inte ...
19. August 2025
Cameo is bringing back the 9 ...
14. August 2025
Recent Post

UNITE FOREVER – Cameo at Tomorrowland 2025
28. August 2025


Popular Posts


LD Systems MAILA reviewed by Production Partner
March 23, 2023

Modern restaurant PA – LD Systems in the Amza Restaurant
December 10, 2024