
How To Build Your Own Disinfection Stand – Using Adam Hall Items
In the current worldwide corona crisis, it is very hard to find suitable stands for disinfectants let alone disinfectant dispensers themselves. To protect our guests and employees we at Adam Hall Group were searching for alternatives and finally built eight prototypes, which have been in continuous use since then. We would like to share this solution with you as it can be a great help for all of us.
You will need the following items from Adam Hall:
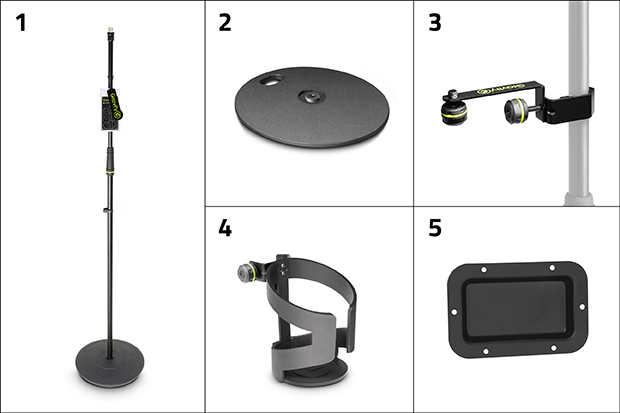
- Microphone stand with round base: Gravity MS 23
- Weight plate for the round base: Gravity MS 2 WP
- Microphone holder/clamp: Gravity MA MH 01
- Drink holder (large): Gravity MA DRINK L
- Dish: Adam Hall Hardware 8705 BLK
Products are also available as a set: Gravity XDS SET 01
Furthermore, you will need the following third-party items:
- Dispenser: Conventional electronic soap dispensers (with motion sensor) can be repurposed for use with disinfectant liquids.
- Disinfectant liquid
- Super glue
Setup
The setup is mostly self-explanatory. In the following we show you step by step how to assemble your own dispenser.
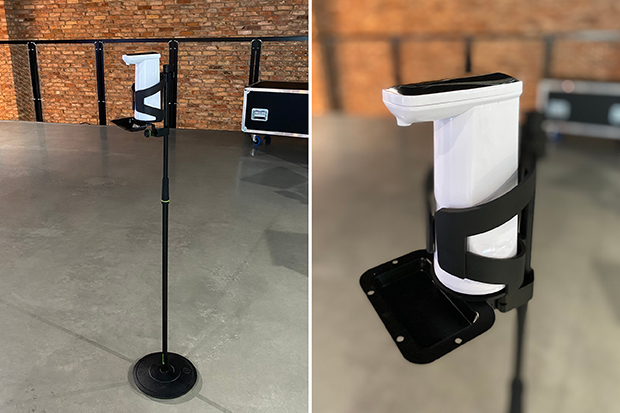
Of course, you can also use any similar stand from another brand. However, this Gravity setup does have one vital advantage: You can mount an additional weight plate to the bottom of the base to make it heavier (Gravity MS 2 WP). This is particularly important if you are using a mechanical dispenser instead of an electronic one.

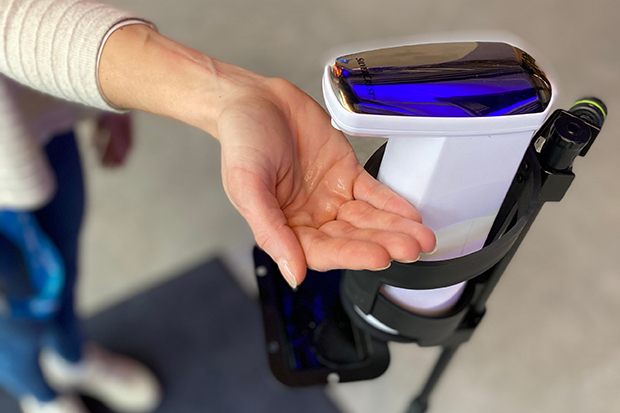
The clamp for the drink holder (Gravity MA MH 01) has been mounted diagonally. This is a standard feature of the Gravity drink holder and ensures that it’s centered on any pole diameter. On the right picture you will see that our drink holder features a gap at the front which functions as a perfect peek hole for the motion sensor.
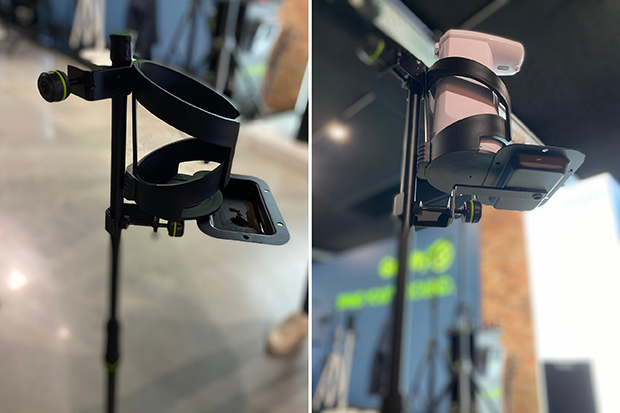
The drip-tray is optional and the only part that requires some customization: Simply remove the front knob of the mic holder clamp and glue the tray onto the flat surface using some super glue.
Notes on soap dispensers
There’s a wide range of soap dispensers available on the market. Most of them work using a tube pump. That means that the fluid travels from the reservoir to the outlet via a tube. The tube is mechanically squeezed to push the liquid along. Therefore, the liquid never gets in direct contact with the pump or other moving parts of the device – and therefore avoids the possible risk that the disinfecting liquid might damage the pump in the long run.
We have tried several models, refillable and non-refillable. It is possible to use any dispenser with a diameter of up to 90mm. Interestingly enough, the cheapest dispenser has been the most reliable so far without any issues.
Disclaimer: Please note that this is most probably not a medically certified use. Although we cannot identify any disadvantages or risks – please note that we cannot take any responsibilities, should issues arise.
Possible faults – and fixes
One of the dispenser types we had stopped working after a while, you could hear the motor running but nothing came out. It turns out that the main cog which was attached to the spindle of the motor became loose and started spinning freely – the fix is quite simple, take the cog out, clean it, add a drop of super glue to the hole and put it back on the spindle and finally reassemble the device.
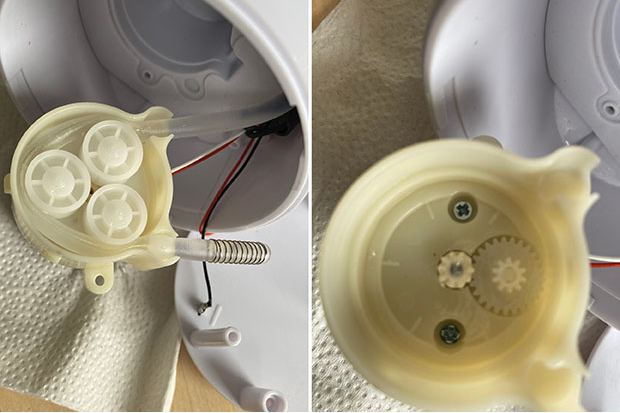
Left: A look inside the tube pump.
Right: The cog that needs to be glued back.
#WeWillGetThroughThisTogether #GravityStands #StandYourGround #EventTech #ExperienceEventTech
More information:
gravitystands.com
This might also interest you

Rich bass instead of engine ...
2. July 2025
DEFENDER® presents Maintena ...
1. July 2025

From old pub to gastronomic ...
24. June 2025
Recent Post


Popular Posts


UK Show Space – Now Open! A Recap of the Opening
January 31, 2024Leave a Comment
You must be logged in to post a comment.