
Perfect light for every scene – part 2: tube types and zoom technologies in detail
Whether it is a theatre stage, concert arena, or museum, the quality of the light projection depends on selecting the right optics. In this second part of our series, we will take a deep dive into the world of tube technologies: what are the advantages and disadvantages of interchangeable tubes compared to zoom tubes? When is a universal zoom the best choice? And how do optical aberrations affect the quality of light? This post is intended for lighting technicians, designers, and operators who want to deepen their knowledge of lens systems and use their spotlights even more effectively to create impressive lighting effects in stage lighting. We will highlight practical application tips and provide valuable decision-making aids for the optimum use of profile spotlights – whether in theatres, city halls, or on large stages.
Tube
As mentioned in the previous post, a lens tube with an adjustable lens is required to project the imaging plane. This is frequently achieved by sliding a tube, which holds the lens, within a tube holder. It is thus reasonable to assume that the tube can be quickly swapped for others with different focal lengths or beam angles. In other words, an interchangeable tube system, such as with the Cameo P2 LED profile spotlight, that can be fitted with interchangeable tubes for 19°, 26°, 36°, and 50°.


Typical interchangeable tubes here from the Cameo P2 series
Selection tip:
Interchangeable tubes are the most cost-effective and are preferred if the intended use is known. For example, for the projection of a cloud image at a certain distance with a corresponding size. Or if other beam angles are not required due to the positioning (gallery spotlights, gutter spotlights) and the stage area is to be illuminated. Typical target groups: musicals, theatres, museums, churches, theme parks.
Zoom tube
Focussing can only be achieved for the above-mentioned lens tube by moving the lens. To do this, however, a certain image size is often required at a certain distance. The focal length f can be adjusted with a second thin lens in accordance with f = f1 x f2 / (f1 + f2 – r). This is referred to as a “zoom”. The lenses must be positioned close together for the imaging plane to still fall within the area between the double and single focal points of the lens combination. The best way to adjust the focus is to move the lens towards the imaging plane. The lens facing the light exit aperture is used to adjust the size of the projection (zoom).
Highly practical: to secure the lenses in the appropriate position, the Cameo P2’s interchangeable zoom tubes allow for single-handed operation, while the focus and zoom setting can be adjusted and locked together with a knob.
CF – focus lens
CZ – zoom lens
The zoom corresponds to an adjustable focal length of the imaging optics


Typical interchangeable zoom tubes; in this case, Cameo P2 series with ergonomic single-handed operation for both lenses.
Selection tip:
Interchangeable zoom tubes are preferred when the size and distance of the projection will vary. In general, there are two zoom ranges. Just like the P2, a long-distance range with a beam angle of 15° to 30° and a short-distance range of 25° to 50°. Typical target groups: rental companies, theatres, city halls.
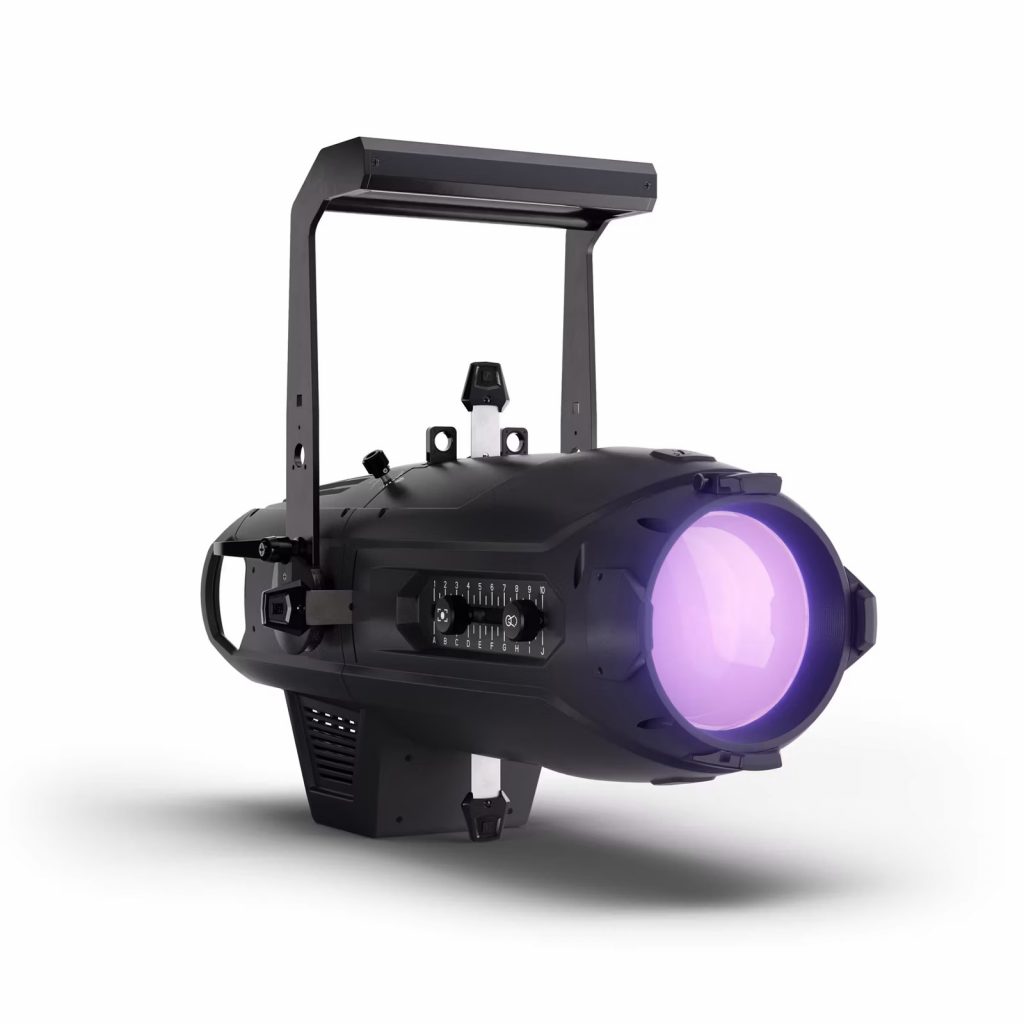
Universal zoom
A universal zoom was developed for moving head profile spotlights so that they could be used in as many positions as possible, or in other words, universally. The limited space in a moving head requires complex lens combinations to make a large zoom range possible. This large zoom range, however, comes at the price of a smaller possible imaging area. The P6 full spectrum ellipsoid with universal zoom features an E-size gobo, while the P2 can display B-size gobos which are commonly used in theatres.
Selection tip:
A universal zoom, as seen in the P6 with a range of 5° to 50°, can be positioned anywhere and project in any size. The P6 can also be used effectively over long distances due to its high output. Typical target groups: rental companies, theatres, city halls.
Aberrations
The optics shown so far are based on an idealized image. A real projection has to contend with many more problems, meaning that finding a simple lens usually doesn’t just happen. The quality of the optics, the cut, the coating, and the combination of lens systems have their price, meaning that the following display problems can be observed to a greater or lesser extent depending on the quality of the optics.
Spherical aberration (caustic)
Only parallel incident rays close to the axis intersect exactly at the focal point. The further the parallel light rays hit the lens from the optical axis, the further they intersect the optical axis before the focal point. A circle of confusion or a light spot is created around the image.
Application tip:
A donat, which is actually nothing more than an aperture plate that is inserted into the colour film compartment, ensures that the light rays are shaded at the edge.
f – focal point
Spherical aberration – edge error of lenses,
Improving image quality with a “donat”
Chromatic longitudinal aberration
In addition to the spherical aberration, you can often see the longitudinal chromatic aberration or colour defect. Blue and red are the light colours at the edge of the visible spectrum. While long-wave red is not refracted as strongly as high-energy blue, a blue or red edge develops at the edge depending on the focal point.
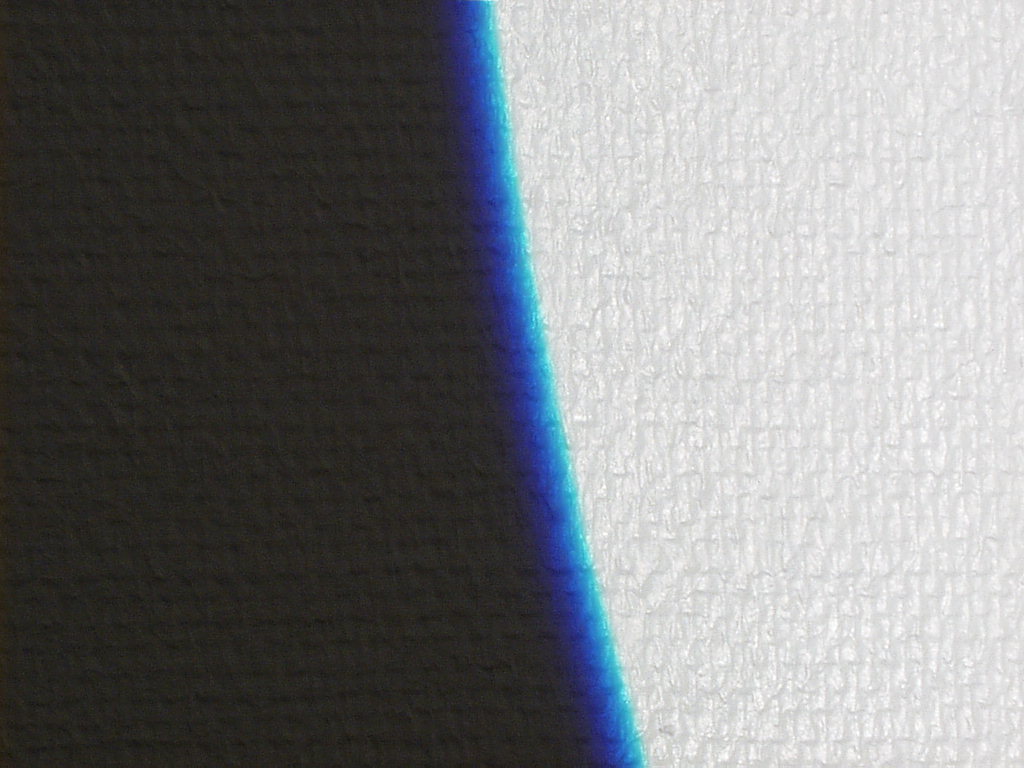
Example of chromatic aberration in blue here.
f – focal point
Physically induced coloured edges (chromatic aberration) resulting from a sharply focused projection.
Application tip:
Coloured edges are highly disruptive, especially when an actor passes through a coloured edge with their face. That’s why the spotlight is often deliberately blurred to achieve less harsh transitions from one spotlight to another. Soft edges are also used for profile spotlights if you want to achieve smooth, continuous illumination of an area or the artist’s path with several spotlights. A frost filter, such as the typical “Hamburg Frost”, is often used for this purpose. To do this, the Cameo P6 features an integrated frost filter, which can be retracted evenly and continuously across the light surface, thereby meeting all requirements.


The built-in continuously variable frost filter is very easy to adjust with a rotary knob.
Astimatism
Astimatism occurs with images that are not projected from the centre. The image point is distorted and blurred in an oval shape. Combinations of lens shapes, known as “anastigmats”, are used to correct this. The comatic or asymmetric aberration occurs when images are not projected from the centre of the optical axis. It is also caused by beams of light travelling parallel to each other and approaching the optical axis at an angle, which are being confined by an aperture. The image is oval with a comet-tail shaped deformation.
A1 – A3 – projected image 1–3
B1 – B3 – projected image 1–3
C – lens
f – focal point
rA – object width
Although A1 and A2 have the same object distance rA, they come into focus at different projection distances.

Still sharp in the centre, blurred towards the edge
Reflections
When a beam of light hits the lens, two interfaces must be surpassed. This means that approx. 4% of the light is still reflected per interface. For two interfaces, this amounts to at least 8%, and 8% of 100% light is perceptible. Aside from the loss of light, the reflections have another unpleasant property. Depending on the other optics present, the reflections can lead to further imperfections on the projected image. It is possible to reduce the disruptive reflections by vapour-coating suitable thin layers onto the glass surface and thus effectively increase the transmittance. This process is referred to as reflection reduction, anti-reflective coating, or coating. The classic anti-reflective coating is a layer of magnesium fluoride. The reduction in reflection also depends on the light’s wavelength. If the coating reduces the reflection from 4.2% to 2.5% at 400 nm, only 1.5% is observed at 450 nm and only 1.2% at 550 nm. This not only allows you to achieve great illumination, but also instead of using one thicker lens with large aberrations, to use two thinner lenses with better optical properties than one thick lens. That is why instead of a single lens, you may also find two lenses positioned very closely together, with the distance between them fixed.
V – virtual reflection image
W – real reflection image
Reflections on the lens can reflect so much light onto a silver gobo that it becomes visible in the projection.
Are you interested in theatre spotlights, stage lighting, and profile spotlights? Then stay tuned, because in the next part we’ll be looking at gobos, shutter blades, and irises.
You missed the first part? Here’s the previous article:
Perfect light for every Scene: introduction to profile spotlights – Part 1
This might also interest you
UNITE FOREVER – Cameo at T ...
28. August 2025
Lights over Seville – Inte ...
19. August 2025
Cameo is bringing back the 9 ...
14. August 2025
Recent Post

UNITE FOREVER – Cameo at Tomorrowland 2025
28. August 2025


Popular Posts


LD Systems MAILA reviewed by Production Partner
March 23, 2023

Modern restaurant PA – LD Systems in the Amza Restaurant
December 10, 2024